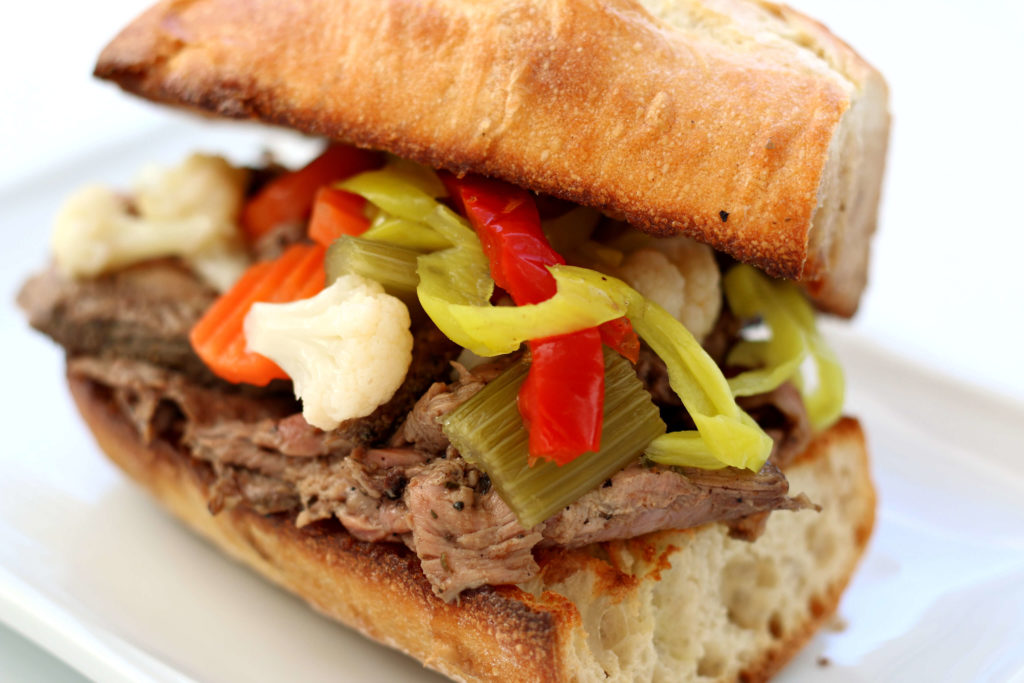
Instant Pot Chicago Italian Beef Sandwich—thinly sliced seasoned roast beef piled onto a bun with flavorful juices and some pickled vegetables. An amazing sandwich with tons of flavor!

Instant Pot Chicago Italian Beef Sandwich
Each week in 2020 I’m sharing a recipe inspired by one of the 50 states. So far I’ve covered Alabama, Louisiana, Utah, Minnesota, Colorado, Idaho, Hawaii and South Carolina. Today’s recipe is inspired by the Prairie State, the Land of Lincoln–Illinois.
And I’m getting even more specific than Illinois with this recipe. I’m going to the Windy City–Chicago–for this recipe. Chicago is such an amazing city that I’ve been to several times. Home of the lovable Chicago Cubs (and many other sports teams) it sits on the beautiful Lake Michigan. There is so much to see and do and EAT in Chicago.
One of Chicago’s famous foods is the Chicago Italian Beef Sandwich. An Italian beef is a sandwich with thin slices of seasoned roast beef, simmered and served with the au jus (the juices it’s cooked in) on a long Italian-style roll. The bread is often dipped in the au jus and the sandwich is typically topped with Chicago-style giardiniera.
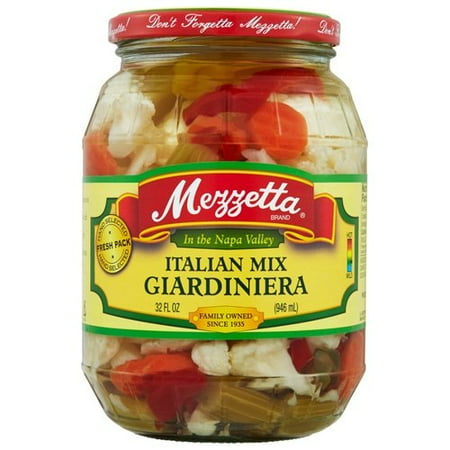
What is Giardiniera? It is an Italian relish of pickled vegetables in vinegar or oil. You can find it by the pickles at your grocery store. Typically it has peppers, cauliflower, carrots and celery. It has a zippy taste that isn’t too spicy if you buy the mild variety.
According to Wikipedia, the exact origin of this sandwich “is unknown, but many believe it was created by Italian immigrants who worked for Chicago’s old Union Stock Yards in the early 1900s. They often would bring home some of the tougher, less desirable cuts of beef sold by the company. To make the meat more palatable, it was slow-roasted to make it more tender, then slow-simmered in a spicy broth for flavor. Both the roasting and the broth used Italian-style spices and herbs. The meat was then thinly sliced across the grain and stuffed into fresh Italian bread.”
I have to say that I delighted in this sandwich. It was truly delicious! I loved the giardiniera on top and my bread dipped in the au jus. If you can’t make it to Chicago to order a Chicago Italian beef sandwich try my version at home in your Instant Pot!
More Instant Pot Beef Recipes to Try…
Instant Pot BBQ Beef Sandwiches
Instant Pot 3-Ingredient Rump Roast
Want more tried and true Instant Pot recipes?
Receive FREE daily Instant Pot recipes and tips in your email box. Sign up by filling out the gray form below. Other ways to follow: join the 365 Days of Instant Pot Recipes Facebook group and subscribe to my YouTube channel where I share Instant Pot stuff with you weekly.

Instant Pot Chicago Italian Beef Sandwich
- Prep Time: 42 minutes
- Cook Time: 38 minutes (10 min pressure build, 3 min cook, 25 minute NPR)
- Total Time: 80 minutes
- Yield: about 10 servings 1x
Description
Thinly sliced seasoned roast beef piled onto a bun with flavorful juices and some pickled vegetables. An amazing sandwich with tons of flavor!
Ingredients
- 1 Tbsp olive oil
- 3 pound beef top round roast
- 2 tsp kosher salt
- 2 tsp black pepper
- 2 tsp garlic powder
- 1 Tbsp Italian seasoning
- 2 cups beef broth (or 2 tsp beef base and 2 cups water)
- 1 bay leaf
- 1/4 cup juice from the jar of Giardiniera
- 1 (32 oz) jar of Giardiniera
- French bread, baguettes, Italian bread loaf or hoagie buns for the sandwiches
Instructions
- Turn your Instant Pot to the saute setting (more). As it is heating up combine the kosher salt, pepper, garlic powder and Italian seasoning to a little bowl and mix. Rub the seasoning mixture evenly all over the roast.
- When the display says HOT add in the oil and swirl it around. Place the roast in Instant Pot and brown for 3 minutes. Turn the roast over and brown for 3 minutes. Brown 2 more sides for 2 minutes each. Remove the roast from the Instant Pot and place it on a plate.
- Deglaze the pot with the beef broth. Then add in the bay leaf and ¼ cup juice from the Giardiniera.
- Place a trivet into the Instant Pot. Set the roast on top of the trivet. Cover the Instant Pot and lock the lid into place. Press the manual/pressure cook button and adjust the time depending on the thickness of your roast. For a 2.5 inch thick roast 3 minutes + 25 minutes natural pressure release. For 3.5 inch thick roast 3 minutes + 30 minutes natural pressure release. See note below.
- Remove the lid and measure the temperature of the roast’s thickest part. The roast should be around 120°F. If the temperature is too low, place the roast back into the pot on top of the trivet and close the lid. Use the “Keep Warm” setting to continue to slow roast the beef. The temperature should rise 7°F – 10°F per 5 minutes.
- Place the roast on a cutting board and loosely tent it with foil. Let the roast rest for about 8 minutes. Use a large serrated knife (or if you have a meat slicer) to cut the roast into the thinnest slices possible. Then place the thin slices into the juices in the Instant Pot. If the meat seems too pink, don’t worry! The hot juices in the Instant Pot will brown up the beef. If you prefer to keep the meat medium rare (pink) then don’t add the meat into the juices until right before serving.
- Slice open your buns and pile the beef and some of the juices onto the bread (this is a messy sandwich! Some people like to dip their bread in the juices before piling on the meat) and then top the meat with some of the Giardiniera. Eat and enjoy!
Notes
What is Giardiniera? It is an Italian relish of pickled vegetables in vinegar or oil. You can find it by the pickles at your grocery store. Typically it has peppers, cauliflower, carrots and celery. It has a zippy taste that isn’t too spicy if you buy the mild variety. Can’t find it? Try using banana peppers.
The thicker your roast, the longer it takes to reach the desired temperature. After pressure cooking time is up keep checking the temperature every 5 – 10 minutes depending on the size of your roast. Once the roast beef has reached 120°F, remove it from the Instant Pot to rest and slice.
I used my 6 quart Instant Pot Duo 60 7 in 1*. You can also use an 8 quart pot for this recipe with no changes. A smaller roast will fit in your 3 quart pot.
- Category: Beef

*Karen Petersen is a participant in the Amazon Services LLC Associates Program, an affiliate advertising program designed to provide a means for sites to earn advertising fees by advertising and linking to amazon.com.
This Instant Pot version is not a true Chicago vendor recipe. It’s a home‑cook shortcut — braised, pressure‑cooked, over‑seasoned, and totally missing the Chicago fundamentals. Who told you this?
It’s basically a pot roast with giardiniera dumped on top.
So good! We had a little over 4lb roast, still did the 3 min pressure cook time with natural release and left it on keep warm about an hour until we were ready to eat (figured it could use the extra time due to the size, too). It was still medium rare – plenty pink and not tough. Those pickled vegetables make it – Never heard of them before! And I did a creamy horseradish sauce (sour cream, Mayo, horseradish, salt, pepper) on thin sliced Italian bread. We paired it with air fryer frozen steak fries and some veggies. Excited for leftovers, too!
That sounds like an outstanding dinner…now I am hungry!!
Can you share the measurements for the sauce you made – that sounds delicious
I think I used this one from Google, but didn’t have the Apple cider vinegar?!
1/2 cup sour cream
2 Tbsp prepared horseradish, drained
2 Tbsp mayo
1 tsp apple cider vinegar
1/4 tsp salt
1/8 tsp black pepper
Hi do you think I could use pre-sliced “carne asada” beef? I would like to skip the step of slicing it at the end
Yep I bet that would be tasty! Try it and let me know!
Hi Karen I have a beef roast. Would that meat work the same??
Is it a chuck roast? If so I would cook it 60 minutes with a natural release.
I followed this recipe this evening and it was awesome! (Minus the bay leaf) Everyone loved it! My husband had a second sub! I used a top round roast (London broil) we like the meat more well done and throwing it back in the pot was perfect. The meat was tender and the spices were great! Thanks!
Sounds awesome! So glad you liked it Danielle!
I made this recipe exactly as written, except I could only get a 3.2 lb “Chuck tender roast” on Friday afternoon in our small grocery store.
It started out about 2-1/2″ thick, and came out looking like a football, all tightened up. I used a long serrated knife, but wish I had my good carving knife with the runnels. It is like shoe leather.
Did I mistakenly think that Chuck is a good all purpose more tender than Round Roast?
I love Giardinara, and the juice was a nice touch, but I had to adjust the taste with Worcestershire sauce.
(I’ve done a pot roast before, and used the drippings to make French onion soup which was to die for. What did I do wrong?)
A chuck would need a much longer cooking time. Like 60 minutes with a full npr. Sorry that it didn’t work out for you!
Is there a cheat sheet for different cuts of meat — especially since they are called different names in different regions and supermarket chains?
I don’t know that I could begin to guess how long to cook different cuts of beef, pork, etc without being sure I have the exact right cut. And butchers aren’t putting Instant Pot cooking times on pkgs of meat yet!!
I have this cheat sheet but it doesn’t have everything on it yet: https://www.365daysofcrockpot.com/instant-pot-cooking-times/
I need to create one just for meats.
This website has a lot of info for cooking times: https://www.hippressurecooking.com/pressure-cooking-times/#meat
Thank you! Yes, a “cuts of meat” IP chart would be a lifesaver. If it was the picture of the cow with the places the cut comes from, and indicated relative toughness, that would help.
I don’t eat much animal protein any more because of the price/lb. This was a $18+ mistake that should have been multiple meals.
Your great recipes have been a primary resource (and I am enjoying the State Food list).
I have been pointedly requesting that my go-to brands include IP instructions on their packaging. Meat and pork and chicken is a whole ‘nother thing that falls to the grocers, I guess. And generally there are no more butchers to ask!
Thank you again. I want to split a brisket with someone — but will do my research before I do. ❤️
I made this recipe exactly like the recipe instructed and it was as tough as a shoe! It’s the first recipe off this website that didn’t work. I think it needs much more pressure cook time. After, I researched other recipes and they have significantly more pressure cooking time. This one was a bust 😢
What kind of roast did you use? How many minutes did you cook it?
Silly question but Italian seasoning like dried herbs or Italian seasoning packet??
Dried herbs!
Hi can you please clarify the time ?
I have a 6 lb roast . Am I doing manual for 30
Minutes ? Then natural release?
I would cut the roast in half and then follow the recipe as written.
It is a 3 minute cooking time (plus browning, don’t forget that) with a LONG natural pressure release.
Check for doneness with a thermometer. The beef is pink, medium rare. Then if you like it more brown cook in the juices at the end.
I am also from the Chicagoland area and agree with Jan, gotta have that melted mozzarella cheese (and maybe some red sauce too)! This looks so good that I need go get one now!!! Thanks!
🙂
I made this last evening and it turned out great. I didn’t have any Giardiniera on hand so I used my Rutabaga slaw and it worked perfectly.
Rutabaga slaw! That sounds tasty.
I’m from the Chgo area and Chicagoans often like to melt mozzarella on the beef. It is a problem when the thin slices of beef remain in the hot juices too long and overcook. The beef can get tough very quickly. But this is always a winner when cooked just right!
We loved it so much Jan! I will try the mozzarella next time.
I’m making this now. I’m a little confused it said to cook for 3 minutes with a 30 minute natural release. Should this be turned around 30 minute cook 3 minute release?
Nope! It’s right. It is a medium rare roast beef. Not the normal 60 plus minutes for a chuck roast!
I’m confused with the measurement of the meat. The roasts I see at the market are a lot wider than 2.5 inches.
you could slice it in half Millie if needs be 🙂
Question? Do you have keto instant pot meals?
I do have some low carb recipes. They aren’t necessarily keto but could be probably changed a bit to be keto friendly. Here they are: https://www.365daysofcrockpot.com/recipes/?fwp_dietary_restrictions=low-carb