This post is part of the Reynolds Real Moms™ contest. I need your vote.
Please vote for me here today (Wednesdays only)!!!
p.s. vote on a regular computer, for some reason the voting doesn’t work on mobile devices. Thanks!
When I’m entertaining I like to enjoy my company and talk
and sit. I don’t like to be in the
kitchen busy at work, while everyone else is enjoying the conversation. I’m assuming many of you are the same
way?
and sit. I don’t like to be in the
kitchen busy at work, while everyone else is enjoying the conversation. I’m assuming many of you are the same
way?
Good.
I’m going to share a
delicious appetizer with you today that can be prepared mostly ahead of
time. Then when it’s time to put it all
together it will take less than 15 minutes!
delicious appetizer with you today that can be prepared mostly ahead of
time. Then when it’s time to put it all
together it will take less than 15 minutes!

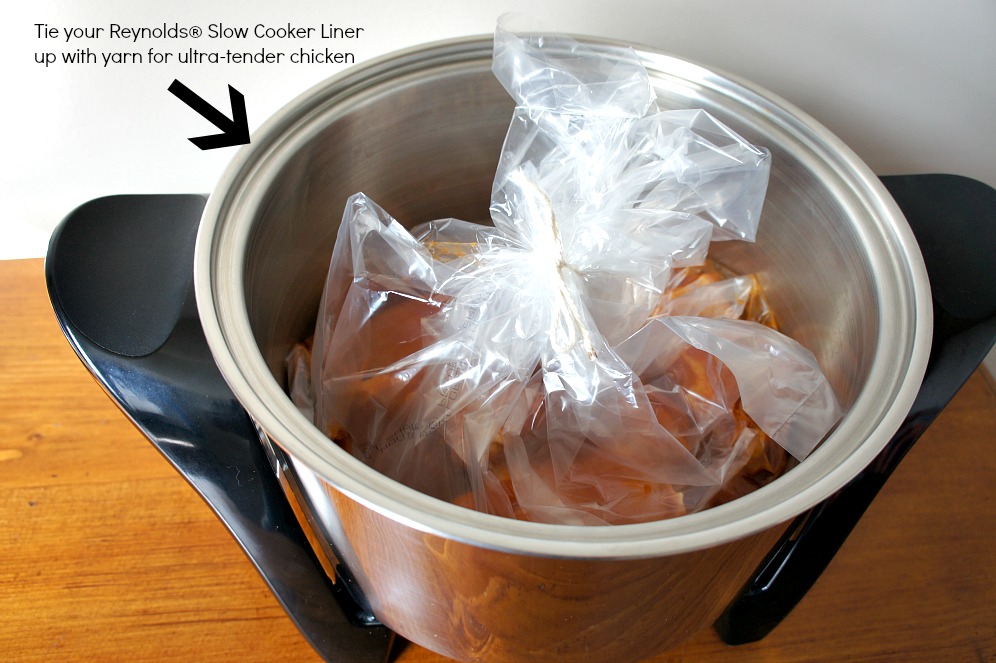
The day before (or the morning of) go ahead and place 4 boneless,
skinless chicken thighs (or more if you want to make a huge platter) in a slow
cooker that has been lined with a Reynolds® Slow Cooker Liner. Top with 1 (10 oz) can of enchilada sauce.
skinless chicken thighs (or more if you want to make a huge platter) in a slow
cooker that has been lined with a Reynolds® Slow Cooker Liner. Top with 1 (10 oz) can of enchilada sauce.
Using a piece of yarn, tie up
the slow cooker liner. Cover the slow
cooker and cook on LOW for about 4-6 hours.
the slow cooker liner. Cover the slow
cooker and cook on LOW for about 4-6 hours.
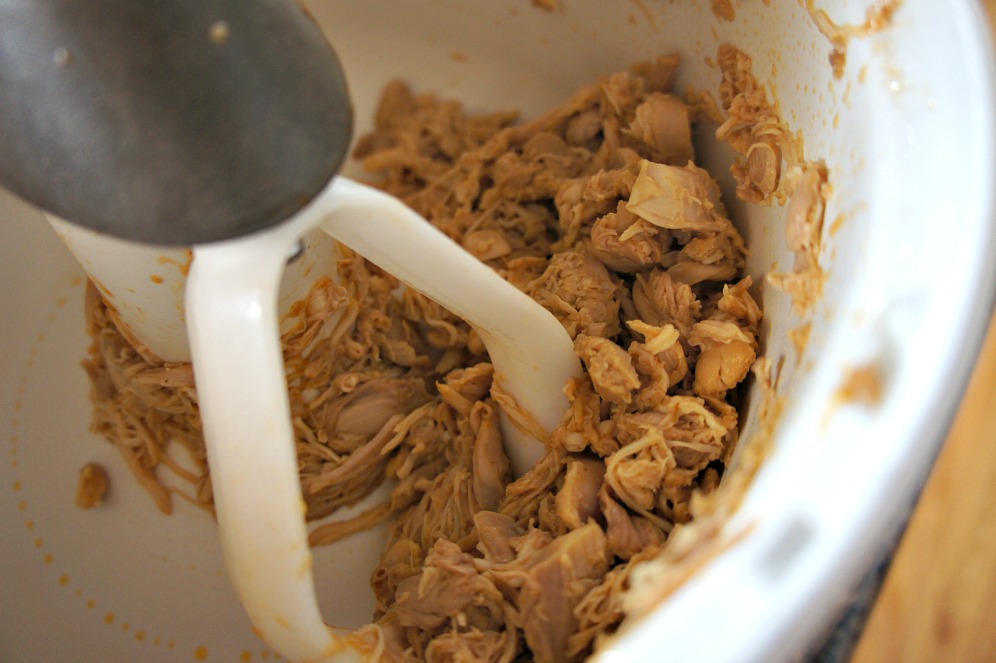
Carefully untie the yarn and open the slow cooker
liner. Remove the chicken and place on a
cutting board. Use two forks to
shred. Or use your Bosch or Kitchen-Aid
to help speed up the process. Place the
chicken in the mixer and turn the mixer to low for about 30 seconds. It should shred the chicken very nicely it no
time!
liner. Remove the chicken and place on a
cutting board. Use two forks to
shred. Or use your Bosch or Kitchen-Aid
to help speed up the process. Place the
chicken in the mixer and turn the mixer to low for about 30 seconds. It should shred the chicken very nicely it no
time!

Here’s what
it will look like:
it will look like:
Put the
chicken in the fridge until you want to assemble your nachos. If you want to get your toppings ready the
day before/morning of your party that would also be a good idea. The toppings that I used were:
chicken in the fridge until you want to assemble your nachos. If you want to get your toppings ready the
day before/morning of your party that would also be a good idea. The toppings that I used were:
Sliced
olives
olives
Salsa
Sour Cream
Grated cheddar
cheese (or a Mexican blend)
cheese (or a Mexican blend)
Avocados (or
guacamole)
guacamole)
Banana
peppers
peppers
1 (14 oz)
can of black beans (drained and rinsed)
can of black beans (drained and rinsed)
As I was making this, my son was busying himself with
painting…and then not cleaning up after himself. Shocker.
painting…and then not cleaning up after himself. Shocker.

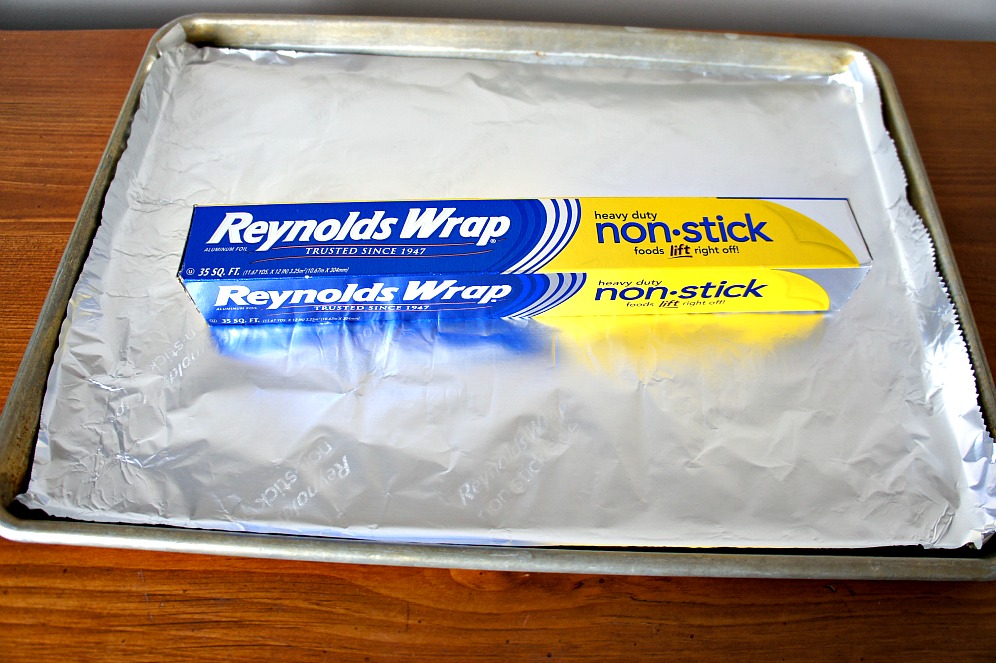
Now,
it’s time for the good part–assembling the nachos! You’re going to use the Reynolds Wrap® Non-Stick Foil. Line a cookie sheet with the foil. Make sure the dull side is up (that’s the
part that is non-stick). Now take your
favorite tortilla chips (I used about half a bag) and lay them across the
foil. Top with the chicken, black beans
and shredded cheese. Then place them in
the oven and bake at 400 degrees for about 10 minutes, until cheese it all
melty.
Now take your avocados, olives, banana peppers, sour cream
and salsa and top your nachos.
and salsa and top your nachos.
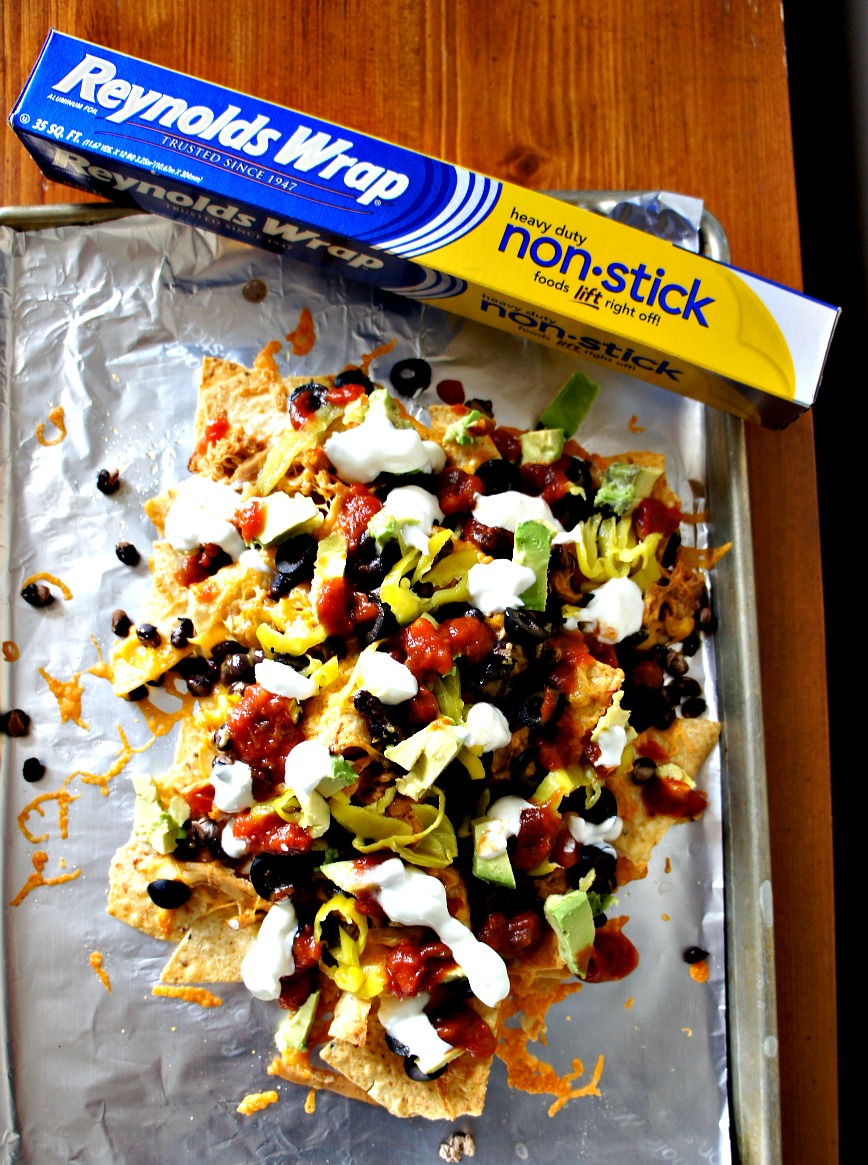
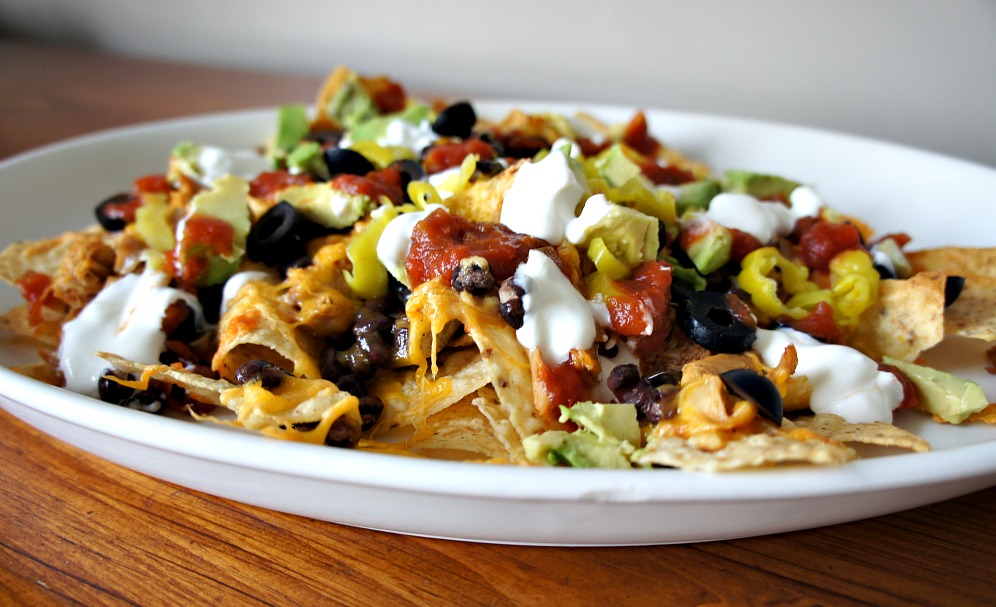
Grab a large platter and gently transfer the heap of nachos
from the Reynolds Wrap® Non-Stick Foil to the platter.
It should slide off very easily.
Now you have a gorgeous plate of nachos.
Is that not gorgeous?
from the Reynolds Wrap® Non-Stick Foil to the platter.
It should slide off very easily.
Now you have a gorgeous plate of nachos.
Is that not gorgeous?
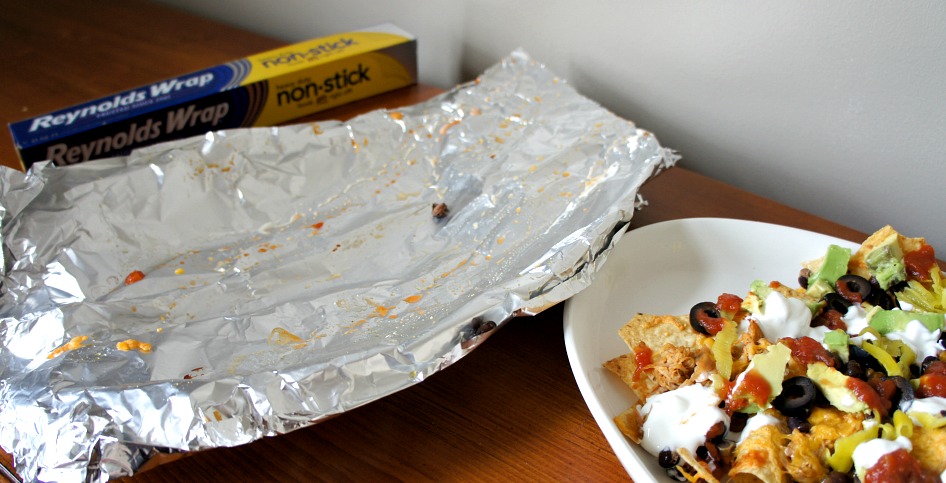
See how nothing sticks to the foil? Awesome.
And easy clean up as well. Just
toss the foil and your pan is clean (no baked on cheese to clean up).
And easy clean up as well. Just
toss the foil and your pan is clean (no baked on cheese to clean up).
The only problem with these nachos is that they will
disappear in a flash! I’m serious when I
say these nachos will blow you away. I
can’t wait to make these again!
disappear in a flash! I’m serious when I
say these nachos will blow you away. I
can’t wait to make these again!


P.S. Make sure to join in all the foodie fun on Twitter, Facebook and Pinterest!
I tie it up because it keeps the chicken really tender!
Just wondering, is there a reason why you tie up the bag?
Thanks!
Looks delish! that is my biggest snacking downfall…nachos 🙂 have to try them soon… and the Reynolds wrap …going to have to try it too 🙂